The Automated, No-Code Data Stack
Learn how Astera Data Stack can simplify and streamline your enterprise’s data management.

Creating a Complex Dataflow in Centerprise – Part 2
Part 2 – Routing Data to Multiple Destinations
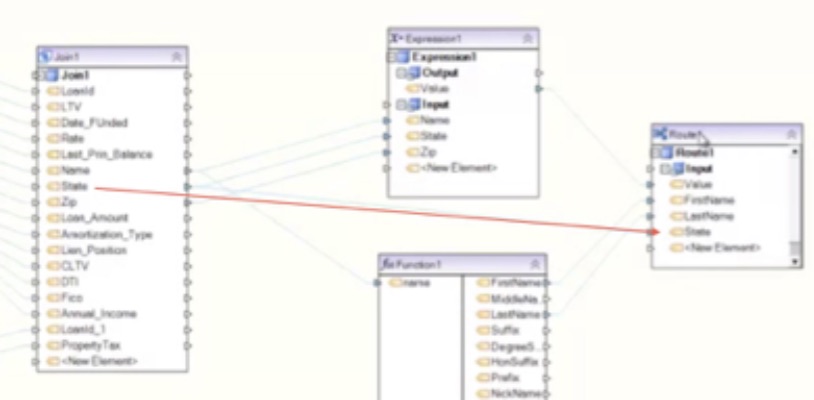
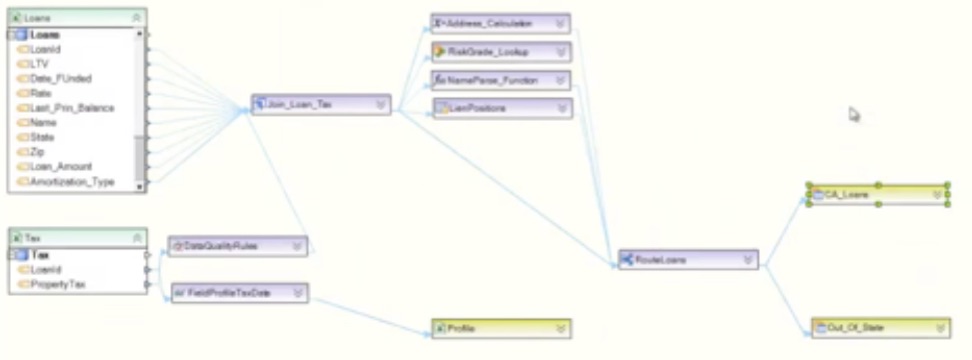
In Part 1 we have learned how to use the Join transformation and different types of maps such as the Expression map and Function map. Now we will use the Router to send data into two different tables depending on the routing information.
We want to decide the destination of the loan depending on its origin state. Take the State field from the transformation window and drag and drop it into the Route, which maps it to the State field in the Route.
Open the router properties and go to the next page, here you can add the rules to decide the different routes. For example, for the California loans we can write a simple rule such as “State equals CA.”
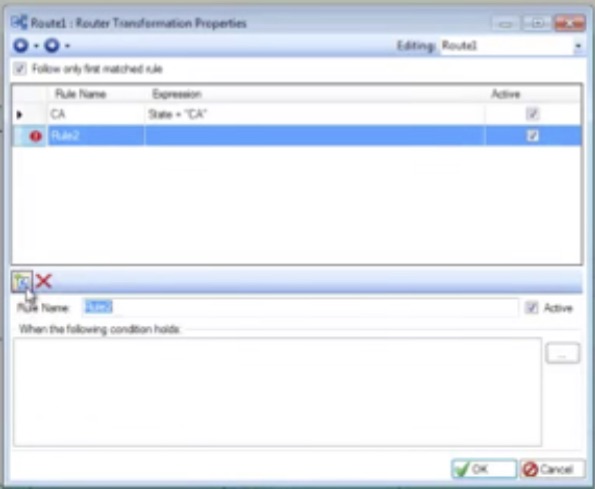
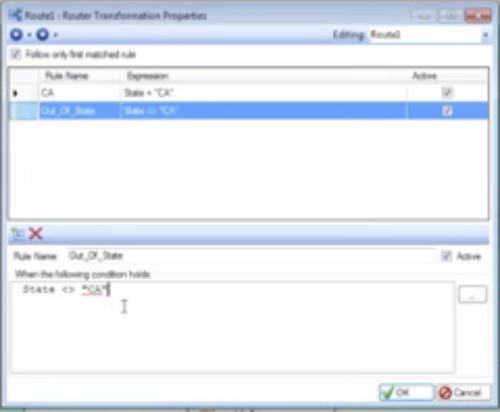
Click on the new rule icon in the left top of the rule window and the next rule we will write is “State does not equal CA.”
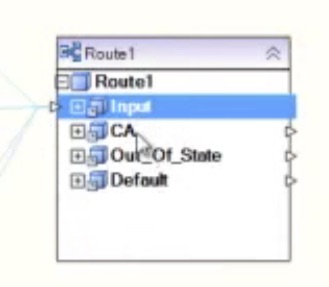
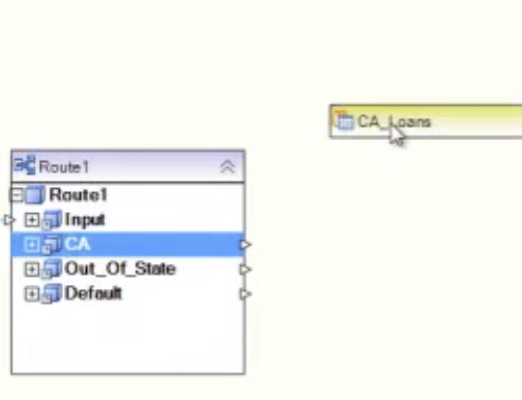
The result in the Router window is that there are two different outgoing nodes available for mapping, CA and Out_Of_State. This enables us to put each set of data in a different table.
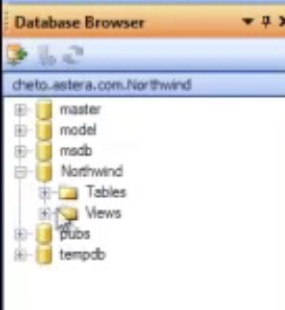
Now we can go ahead and create the destination tables for the routed loans. We need to create one for California loans and one for Out_Of_State loans. You can drag and drop the database table destination from the toolbox onto the designer, however, you can also use a shortcut for creating a database table source or destination using the database browser. You simply select the database browser underneath the toolbox and point to one of the existing connections.

The browser will then show you all the existing databases, including tables and views.
Select the tables folder, which shows all the tables in the database and we can see the California loans table.
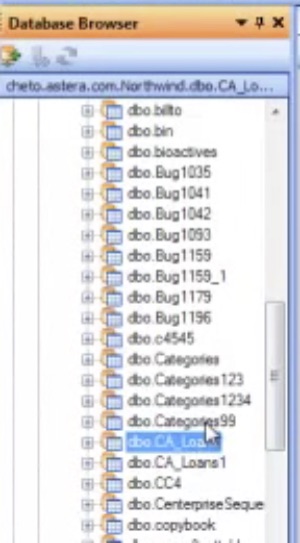
Select the California loans table, press shift, and drag and drop it onto the designer to create the destination.
Follow the same steps to create the Out_Of_State Loans destination.
If we expand the CA_Loans designation, we can see that we have all the fields and we can do our map from the Route to each destination. Drag the CA field from the router to the destination, and do the same for the Out_Of_State_Loans.

So with these few clicks we have created the scenario we started with in the very first image. We have the Loans and Taxes sources, we did the join, we did the calculation for the Address and Name Parse function, and, finally, we did the routing to send the loans to two different destination tables.
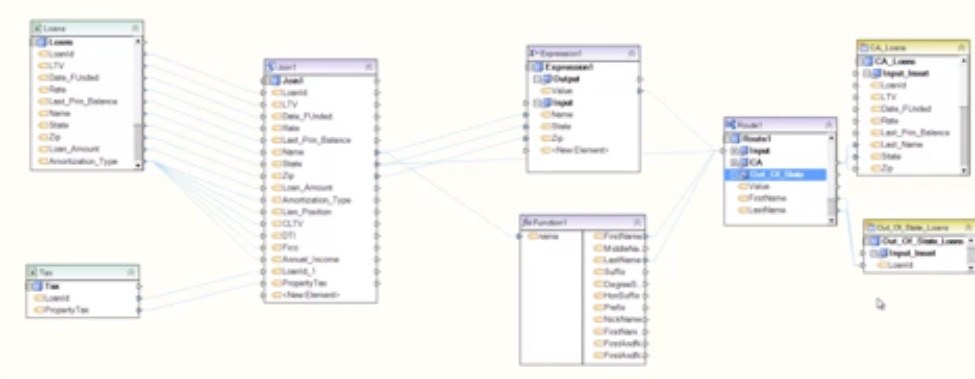
However, as you can see if you compare this to the first image at the beginning of the blog, there are a couple of lookups along with the address calculation and name parsing, as well as a data quality rule to check the data coming from the tax source.
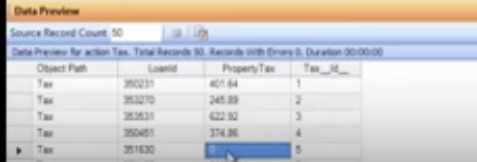
If we open the preview window for the tax data, we can see that for some loans the tax is showing zero.
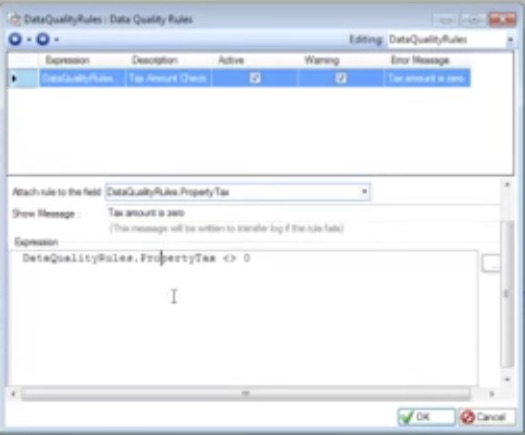
We need to check whether the source data is correct or not, so we add a data quality rule, which can be found in the toolbox transformations. Drag and drop it onto the designer and do the mapping as with any other transformation. Open the properties window and a rule can be written to specify that the property tax cannot be zero.
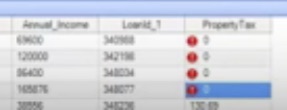
Now do a preview on the loan tax join. Since the data is passing through the data quality rule you can see that the data quality rule has flagged all the errors.
Another thing that has been done is to add a profile of the tax data. If you do a preview you can see that for the LoanID and the PropertyTax fields the information about the all the values has been collected.

Since the profile is like any other source, it can be mapped to an Excel spreadsheet destination and when the dataflow is run, it puts the information in the Excel sheet, which becomes our report. So along with doing the data transfer, a report on the tax data is provided as well.
This is a quick overview has demonstrated how to create a complex dataflow in Centerprise. In Part 1 we learned how to combine data from two sources using a join, send the data for transformation and mapping, and create a function. In Part 2 we learned how to route our data to two different destination tables. For more information on creating workflows and subflows, visit our Astera TV Workflows and Subflows playlist.